Budget-Friendly Concrete Pathway Guide 2024 | Hardcrete Concreters Gold Coast

Key Highlights Concrete pathways offer a-friendly option for enhancing the aesthetic appeal and functionality of your outdoor space. With their durability and low maintenance requirements, concrete are a practical choice homeowners. You choose between straight and curved to suit your landscape and design preferences. DIY installation of a concrete pathway is possible with the right tools and materials. cleaning, sealing, and timely repair can help maintain the longevity of your concrete pathway. Adding decorative borders and incorporating exposed aggregate finishes can further enhance the appeal of your concrete pathway. Introduction Concrete pathways have become increasingly popular among homeowners who are looking for a budget-friendly way to enhance the aesthetic appeal and functionality of their outdoor spaces. Concrete is a versatile material that offers a wide range of design options and benefits, such as durability, low maintenance, and practicality. Whether you want to create a pathway from the side of your house to your garden or construct a walkway to your front door, concrete is an excellent choice. It can be customized to match the style and color scheme of your home, giving it a cohesive and visually appealing look. Additionally, concrete pathways are known for their long lifespan, making them a wise investment for any homeowner. In this guide, we will walk you through the process of planning, installing, and maintaining a budget-friendly concrete pathway. We will explore different design options, including straight and curved pathways, as well as decorative borders and exposed aggregate finishes. By the end of this guide, you will have all the information you need to create a beautiful and durable concrete pathway that will enhance the overall look of your outdoor space. Planning Your Concrete Pathway Before you start the installation process, it is important to plan your concrete pathway carefully. Consider the landscape of your outdoor area and how the pathway will fit into the overall design. Think about where you want the pathway to start and end, and how it will connect different areas of your outdoor space. Take into account any obstacles or features in your landscape, such as trees or flower beds, that may need to be worked around. Measure the area where the pathway will be installed to determine the amount of concrete and other materials you will need. Keep in mind the purpose of the pathway. If you are creating a pathway from the side of your house to the backyard, consider the width and length of the pathway to ensure it is practical for daily use. If you are creating a pathway to the front door, think about the aesthetic appeal and how it will complement the overall design of your home. Assessing Your Landscape and Pathway Needs When assessing your landscape and pathway needs, consider the practicality of the pathway. Will it be used for walking or for other purposes, such as pushing a wheelbarrow or carrying heavy objects? This will determine the width and strength of the pathway. If you have a sloping landscape, you may need to consider steps or ramps to ensure accessibility. If you have a concrete driveway, you may want to connect the pathway to it seamlessly. Consider the overall design of your landscape and how the pathway will fit into it. Will it be a focal point or a subtle addition? Take into account any existing features, such as trees or flower beds, and plan the pathway around them. By assessing your landscape and pathway needs, you can ensure that your concrete pathway is not only visually appealing but also practical and functional for everyday use. DIY Concrete Pathway Installation Steps If you enjoy DIY projects, you can save money by installing your own concrete pathway. Here are the basic steps to follow: Prepare the ground: Excavate the area where the pathway will be installed and create a firm base. Install formwork to define the shape of the pathway. Add gravel: Add a layer of gravel to the excavated area to improve drainage and provide a stable base for the concrete. Mix the concrete: Follow the instructions on the cement and concrete mix to create the right consistency for pouring. Pour the concrete: Pour the concrete onto the prepared area within the formwork. Use a trowel to spread and level the concrete. Finish the surface: Use a float or trowel to smooth the surface of the concrete. Add any decorative finishes or textures at this stage. Allow the concrete to cure: Cover the concrete with plastic or damp burlap to prevent it from drying out too quickly. Allow it to cure for at least 7 days before using the pathway. By following these steps and using the right tools and materials, you can successfully install a DIY concrete pathway that is both functional and aesthetically pleasing. Preparing the Ground for Your Pathway Before you start pouring the concrete for your pathway, it is important to properly prepare the ground. This will ensure that the pathway is stable and long-lasting. The first step is to excavate the area where the pathway will be installed. Dig down to a depth of at least 4 inches to remove any grass, plants, or debris. Use a shovel or a small excavator to make the process easier. Once the area is excavated, you will need to install formwork to define the shape and dimensions of the pathway. Formwork can be made from wood, plastic, or metal and should be secured firmly in place. After the formwork is in place, add a layer of gravel to the excavated area. This will provide a stable base for the concrete and help with drainage. Compact the gravel using a hand tamper or a plate compactor to ensure a solid foundation. By properly preparing the ground, you are setting the stage for a successful concrete pathway installation. Taking the time to excavate, install formwork, and add gravel will result in a pathway that is durable and long-lasting. Mixing and Pouring the Concrete Once the ground is prepared, it’s time
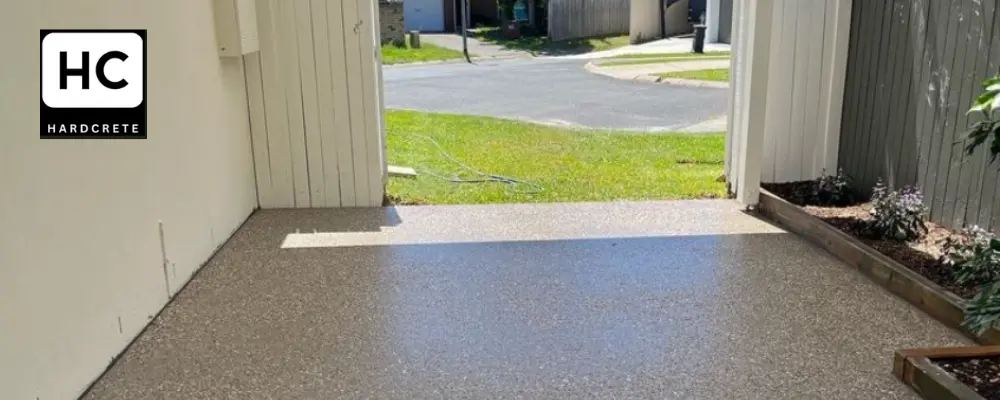
Gold Coast Trends: Exposed Aggregate vs. Stamped Concrete

Key Highlights Exposed aggregate concrete and stamped concrete are two popular decorative concrete options for driveways, patios, and other outdoor surfaces. Exposed aggregate concrete offers a natural stone-like appearance and is known for its durability and low maintenance. Stamped concrete allows for a wide range of design options and is more affordable than natural stone or pavers. Both types of concrete have their advantages and it ultimately depends on your personal preferences and project requirements. Factors such as price, durability, and appearance should be considered when choosing between exposed aggregate and stamped concrete. Consulting with a professional concrete contractor can help you make the best decision for your Gold Coast property. Introduction When it comes to choosing the right material for your Gold Coast property, there are a plethora of options available. One of the most popular choices for driveways, patios, and other outdoor surfaces is decorative concrete. In particular, exposed aggregate concrete and stamped concrete have become increasingly popular due to their unique aesthetic appeal and durability. These outdoor surfaces not only enhance the overall look of your property, but they also make a statement to your neighbours and passers-by. Gone are the days when concrete was limited to a dull, grey appearance. With the advent of decorative concrete, homeowners and businesses now have a wide range of styles, colors, and finishes to choose from. Exposed aggregate concrete and stamped concrete are two such options that have gained significant popularity in recent years, offering unparalleled stylishness and limitless design options. Both exposed aggregate and stamped concrete offer distinct advantages and can enhance the curb appeal of any property. However, it is important to understand the differences between the two options and consider factors such as price, durability, and appearance in order to make an informed decision. In this blog, we will explore the key characteristics of exposed aggregate and stamped concrete, and highlight their benefits for Gold Coast properties. So, let’s dive in and uncover the world of decorative concrete! Understanding Exposed Aggregate and Stamped Concrete Decorative concrete has revolutionized the way we think about traditional concrete surfaces. No longer limited to plain, grey slabs, decorative concrete offers a variety of options to suit different preferences and design aesthetics. Exposed aggregate and stamped concrete are two popular choices within the realm of decorative concrete. Exposed aggregate concrete is a type of decorative paving finish that exposes the natural stones and aggregates within the concrete, creating a strong and eye-catching top layer. This results in a visually appealing surface that is both durable and low maintenance. On the other hand, stamped concrete involves pressing patterns or textures onto the surface of freshly poured concrete, creating a unique and customized look. Both exposed aggregate and stamped concrete have become popular choices for Gold Coast properties due to their versatility and aesthetic appeal. Which one is the right choice for your project? Let’s delve deeper into the basics of each option to help you make an informed decision. The Basics of Exposed Aggregate Exposed aggregate concrete is a popular choice for Gold Coast properties due to its natural stone-like appearance and durability. This type of decorative concrete involves removing the outer layer of the concrete to expose the aggregates, such as stones, pebbles, or shells, within the mix. The result is a surface that showcases the natural beauty of the aggregates, creating a unique and visually appealing look. One of the main advantages of exposed aggregate concrete is its durability. The aggregates provide added strength and resistance to wear and tear, making it suitable for high-traffic areas such as driveways and pathways. Additionally, exposed aggregate concrete requires minimal maintenance, as the surface is resistant to staining and can be easily cleaned with water and mild soap. The aesthetic versatility of exposed aggregate concrete is another key factor that makes it a popular choice. With a wide range of aggregate options available, homeowners can create a customized look that complements their existing landscaping or architectural style. Whether you prefer a rustic, natural stone appearance or a more modern, polished look, exposed aggregate concrete offers limitless design possibilities. The Basics of Stamped Concrete Stamped concrete is another popular choice for Gold Coast properties seeking a decorative concrete solution. This technique involves pressing patterns or textures onto the surface of freshly poured concrete, resulting in a surface that resembles materials like brick, slate, or stone. One of the main advantages of stamped concrete is its ability to mimic high-end materials while offering a more cost-effective solution. With a wide range of patterns and colors to choose from, homeowners can achieve the look of natural stone or other materials at a fraction of the cost. Stamped concrete is a versatile option that can be customized to suit any design aesthetic, making it a popular choice for both residential and commercial projects. In addition to its visual appeal, stamped concrete is a durable and long-lasting option. The concrete surface is resistant to wear and tear, making it suitable for high-traffic areas. However, considering the pros and cons of both exposed aggregate and stamped concrete, it is important to note that stamped concrete may require periodic cleaning and re-sealing to protect against damage and maintain its appearance. Benefits of Exposed Aggregate for Gold Coast Properties Exposed aggregate concrete offers a range of benefits for Gold Coast properties, making it a popular choice for driveways, pathways, and other outdoor surfaces. One of the main advantages of exposed aggregate is its natural and visually appealing appearance. The exposed stones and aggregates, including coloured concrete options, create a unique texture and color variation that adds character to any space. In addition to its aesthetic appeal, exposed aggregate is a durable and low-maintenance option. The aggregates within the concrete provide added strength and resistance to wear and tear, making it suitable for high-traffic areas. Furthermore, exposed aggregate requires minimal maintenance, as the surface is resistant to staining and can be easily cleaned with water and mild soap. Another advantage of exposed
The Ultimate Guide: Plain Concrete vs Exposed Aggregate
Key Highlights Both plain concrete and exposed aggregate are strong, long-lasting, and cost-effective options for your Melbourne home. Plain concrete is a durable and clean-looking finish, while exposed aggregate offers a wide variety of design options. Plain concrete requires very little maintenance and can withstand Melbourne’s extreme weather conditions. Exposed aggregate may require more maintenance due to its textured surface. Plain concrete is generally cheaper than exposed aggregate, but the choice depends on your specific needs and preferences. Consider the aesthetic appeal, durability, maintenance needs, and cost when choosing between plain concrete and exposed aggregate. Introduction When it comes to choosing the right type of concrete for your Gold Coast home, the decision between plain concrete and exposed aggregate can be a tough one. Both options have their own unique characteristics and benefits, making it important to understand the differences before making a choice. Plain concrete is a traditional and durable finish that provides a clean and uniform look to your driveway, patio, or slab. It is made up of a mixture of cement, aggregate, and water, and is poured in place and smoothed out for a smooth, grey surface. On the other hand, exposed aggregate offers a more decorative and textured look, with a top layer that is removed to reveal the embedded aggregate beneath. In this guide, we will delve into the nuances of plain concrete and exposed aggregate, exploring their definition, composition, installation process, aesthetic appeal, durability, maintenance needs, cost considerations, and environmental impact. By the end, you will have a comprehensive understanding of both options, allowing you to make an informed decision that best suits your needs and preferences. So, let’s dive in and settle the debate between plain concrete and exposed aggregate once and for all! Understanding Plain Concrete and Exposed Aggregate Before we delve into the details, let’s understand what plain concrete and exposed aggregate concrete actually mean. Plain concrete, also known as standard concrete or concrete surface, is a type of concrete that provides a smooth and uniform finish. It is commonly used in construction due to its strength and durability. On the other hand, exposed aggregate concrete is a type of concrete where the top layer is removed to expose the embedded aggregate, such as small stones or pebbles. This gives the concrete a textured and decorative appearance. Both plain concrete and exposed aggregate concrete have their own unique characteristics and advantages, which we will explore in the following sections. So, let’s dig deeper into the definition and basic composition of these two types of concrete. Definition and Basic Composition Plain concrete, also known as standard concrete or concrete surface, is a commonly used construction material due to its versatility and durability. It is made by mixing cement, aggregate (such as sand or gravel), and water. The proportions of these ingredients may vary depending on the specific application and desired strength of the concrete. The basic composition of plain concrete typically consists of cement, which acts as a binder, and aggregate, which provides the bulk and strength to the concrete. Water is added to the mixture to initiate the chemical reaction that causes the concrete to harden and gain its strength. Standard concrete is classified into different grades based on its strength and composition. The most common grade used in construction is known as normal class concrete, which has a compressive strength ranging from 20 to 40 megapascals (MPa). This type of concrete is suitable for various applications, including driveways, pathways, and slabs. Now that we have a basic understanding of plain concrete, let’s explore its historical background and evolution. Historical Background and Evolution Concrete has been used as a construction material for thousands of years, with evidence of its use dating back to ancient civilizations such as the Egyptians and Romans. However, the use of plain concrete as we know it today has evolved over time. In the early days, concrete was primarily made from a mixture of lime, sand, and water, known as lime concrete. This type of concrete was widely used in ancient structures due to its ability to harden and withstand the test of time. Over the years, advancements in technology and the discovery of cement as a binding agent led to the development of modern concrete. The introduction of reinforced concrete, which includes the addition of steel bars or mesh within the concrete, further enhanced its strength and durability. Today, plain concrete is one of the most widely used construction materials, thanks to its affordability, versatility, and long-lasting properties. With the advent of new techniques and materials, such as exposed aggregate, homeowners now have more options to choose from when it comes to concrete finishes. Now that we have explored the historical background and evolution of concrete, let’s move on to the installation process and compare the installation steps for plain concrete and exposed aggregate. The Installation Process Compared: plain concrete vs exposed aggregate Installing a new concrete driveway, patio, or slab involves a series of steps to ensure a strong and durable result. While the installation process for plain concrete and exposed aggregate is similar in some aspects, there are key differences to consider. The installation process for plain concrete involves preparing the site, pouring the concrete mixture in place, and smoothing it out to achieve a uniform finish. The concrete is then left to cure and harden before it can be used. On the other hand, the installation process for exposed aggregate concrete involves a few additional steps. After pouring the concrete, a special chemical is sprayed on the surface to prevent the top layer from hardening. This wet surface is then protected for a certain period, typically 24 hours, before the top layer of concrete is removed using a power-washer. This exposes the aggregate beneath and gives the concrete its textured appearance. Now that we understand the installation process for both types of concrete, let’s delve into the specific steps involved in installing plain concrete and the key differences in exposing aggregate. Steps
Easy DIY Concrete Pathway Ideas for Your Outdoor Space
Key Highlights Concrete pathways are a durable and versatile option for your outdoor space You can choose from various pathway designs such as plain concrete, coloured concrete, stamped concrete, and more Planning and preparation are key when it comes to DIY concrete pathways Essential tools and materials for your concrete pathway include leveling tools, concrete mix, and more Designing your pathway with patterns, textures, and colors can add a unique touch to your outdoor space Proper maintenance is important to ensure the longevity of your concrete pathway Introduction Concrete pathways are a popular choice for homeowners looking to enhance the functionality and aesthetic appeal of their outdoor space. Whether you want to create a walkway from your front yard to your backyard or add a path around your garden, concrete provides a durable and versatile solution. Concrete pathways come in various designs and styles, allowing you to customize them to suit your personal preferences and the overall design of your outdoor space. From plain concrete to colored concrete and stamped concrete, there are endless possibilities when it comes to creating a unique and beautiful pathway. In this blog, we will guide you through the process of planning, designing, and creating your own DIY concrete pathway. We will discuss the essential tools and materials you will need, as well as provide step-by-step instructions on how to mix and pour concrete. Additionally, we will explore different design options for your pathway, including incorporating patterns, textures, and colors to ensure both durability and mobility for all users. By the end of this blog, you will have all the information you need to create a stunning concrete pathway that adds both functionality and visual appeal to your outdoor space. Planning Your DIY Concrete Pathway Before diving into the actual construction of your DIY concrete pathway, it is important to spend some time planning and preparing. This will ensure that you have a clear vision of what you want to achieve and that you have all the necessary tools and materials on hand. When planning your pathway, consider the overall layout of your outdoor space and how the pathway will fit into it. Think about the purpose of the pathway and how it will enhance the accessibility and flow of your outdoor area. Additionally, consider factors such as the size and shape of the pathway, as well as any landscaping features or obstacles you may need to work around. Assessing Your Outdoor Space Before you start creating your DIY concrete pathway, it is important to assess your outdoor space and determine the best location for the pathway. Consider the layout of your front garden or backyard and identify areas where a pathway would be most beneficial in terms of accessibility and functionality. Think about how the pathway will connect different areas of your outdoor space, such as your patio, garden, or driveway. Take into account any existing landscaping features, such as trees or flower beds, and plan the pathway around them to create a cohesive and visually appealing design. Accessibility is also a crucial factor to consider when assessing your outdoor space. Ensure that the pathway is wide enough for easy passage and that it is free from any obstacles or hazards. This will not only make the pathway safer to walk on but also enhance the overall usability of your outdoor space. Choosing the Right Pathway Design When it comes to choosing the design for your DIY concrete pathway, you have several options to consider. Plain concrete is a versatile choice that can easily blend into any outdoor space. It provides a clean and modern look that is timeless and durable. Colored concrete, on the other hand, allows you to add a splash of color to your pathway. You can choose from a wide range of hues to complement your home design, landscaping, or other hardscaping features in your front garden. Another popular option is stamped concrete, which allows you to create patterns and textures that mimic the look of stone or brick. This is a cost-effective alternative to using actual stone or brick, and it offers a more modern appeal. Consider the design versatility of each option and choose the one that best suits your personal style and the overall aesthetic of your outdoor space. Keep in mind that the design of your pathway, including options such as exposed aggregate pathways, can greatly impact the overall look and feel of your outdoor area, so take the time to choose a design that you will love for years to come. Essential Tools and Materials for Your Concrete Pathway Before you start creating your DIY concrete pathway, it is important to gather all the essential tools and materials. Having everything on hand will make the construction process smoother and more efficient. Some of the essential tools you will need include a shovel, wheelbarrow, trowel, levels, and a concrete mixer. These tools will help you with tasks such as digging, leveling, and mixing the concrete. In terms of materials, you will need concrete mix, water, and any additional materials depending on the design of your pathway. This may include coloring agents for colored concrete or stamping mats for stamped concrete. By having all the necessary tools and materials, you will be well-prepared to tackle your DIY concrete pathway project. List of Tools Needed To create your DIY concrete pathway, you will need the following tools: Shovel: For digging and preparing the ground for the pathway Wheelbarrow: For mixing the concrete and transporting materials Trowel: For spreading and smoothing the concrete Levels: For ensuring an even and level surface Concrete mixer: For mixing the concrete mixture efficiently These tools are essential for the various stages of creating your concrete pathway. Make sure to have them on hand before you begin your project to ensure a smooth construction process. Selecting Quality Concrete Mix The quality of the concrete mix you use is crucial for the longevity and durability of your DIY concrete pathway. It is important to
Concrete Carbon Emissions Reduction: Expert Tips
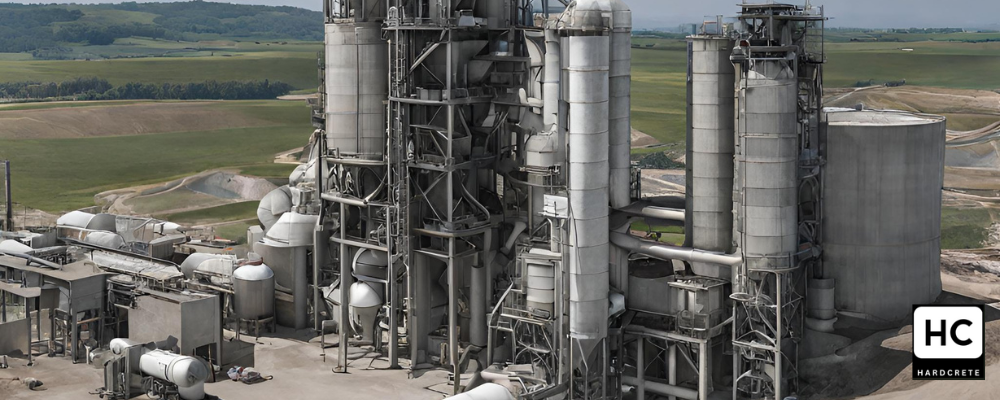
Reduce Concrete Carbon Emissions: Expert Tips Key Highlights Concrete production is responsible for 8% of global carbon emissions, making it crucial to find ways to reduce its environmental impact. Key strategies for reducing concrete carbon emissions include improving energy efficiency, using low-carbon cement alternatives, and incorporating supplementary cementitious materials (SCMs). Promising innovations in the industry include breakthroughs in carbon capture, utilization, and storage (CCUS) and the development of eco-friendly concrete through biotechnology. Sustainable urban planning and design, along with maintenance and recycling efforts, can also contribute to reducing concrete usage and emissions. Policies and regulatory frameworks are essential in supporting emission reductions in the concrete industry, both at the global and national levels. The private sector, including construction companies and cement manufacturers, plays a crucial role in reducing concrete carbon emissions through corporate responsibility and sustainable practices. Introduction Concrete is one of the most widely used construction materials, playing a vital role in the development of our cities and infrastructure. However, its production comes at a significant cost to the environment. Concrete production is responsible for approximately 8% of global carbon emissions, with tons of carbon emitted annually, making it a major contributor to climate change. As the demand for concrete continues to rise, it is essential to find ways to reduce its carbon footprint. This blog explores expert tips and strategies for reducing concrete carbon emissions, from innovative technologies to sustainable design and construction approaches. By implementing these strategies, we can minimize the environmental impact of concrete production and work towards a more sustainable future. Understanding the Impact of THE Concrete carbon footprint Concrete production involves the use of portland cement, which is a key ingredient in the process. However, the production of portland cement releases a significant amount of carbon dioxide (CO2) into the atmosphere, contributing to global carbon emissions. The concrete industry is also responsible for a large share of global cement production, which further adds to its carbon footprint. To address this issue, it is crucial to understand the role of cement in concrete’s carbon emissions and explore alternatives, such as incorporating fly ash or other substitutes, in the concrete mix to reduce its environmental impact. Concrete: A Major Contributor to Global Emissions Concrete production is a major contributor to global carbon emissions due to the carbon dioxide released during the production of portland cement. The cement industry accounts for a significant portion of global emissions, with the emissions intensity of production increasing in recent years. The global demand for cement is expected to continue to grow, making it essential to find ways to reduce its carbon footprint and decrease the consumption of large amounts of energy. By implementing strategies to improve energy efficiency, switch to lower-carbon fuels, and promote material efficiency, we can significantly reduce the carbon emissions associated with concrete production in the US, EU, and around the world. The Role of Cement in Concrete’s Carbon Footprint Cement plays a crucial role in concrete’s carbon footprint. Portland cement, the most common type of cement used in concrete production, is made by heating limestone and other materials in a kiln, which releases carbon dioxide as a byproduct. The carbon footprint of cement is further increased by the high energy requirements of the cement manufacturing process. As cement is a key ingredient in concrete, reducing its carbon footprint is essential for mitigating the environmental impact of concrete production. By exploring alternative cementitious materials and improving the efficiency of cement production, we can significantly reduce the carbon emissions associated with concrete. Innovative Strategies for Reducing Concrete Carbon Emissions Innovative strategies are being developed to reduce concrete carbon emissions and create a more sustainable industry. These strategies focus on using low carbon concrete, exploring cement alternatives, and incorporating supplementary cementitious materials (SCMs) into concrete mixtures. By adopting these innovative approaches, the concrete industry can significantly reduce its carbon footprint and contribute to global emission reduction goals. These strategies require advancements in technology, research, and collaboration between industry stakeholders, including the Cement Association of Canada, to achieve widespread adoption and make a meaningful impact on reducing concrete carbon emissions and promoting the use of sustainable building materials. Advancements in Low-Carbon Cement Alternatives One promising strategy for reducing concrete carbon emissions is the development of low-carbon cement alternatives. These alternatives aim to replace or partially substitute portland cement with materials that have a lower carbon footprint. For example, fly ash, a byproduct of coal combustion, can be used as a cement substitute in concrete production. Other alternatives include blast furnace slag, which is a byproduct of the iron and steel industry, and calcined clay. By incorporating these low-carbon alternatives into concrete mixtures, the carbon emissions associated with cement production can be significantly reduced. Additionally, advancements in low-carbon cement alternatives have allowed for the reduction of cement content in concrete, further decreasing its carbon footprint. Incorporating Supplementary Cementitious Materials (SCMs) Another innovative strategy for reducing concrete carbon emissions is the incorporation of supplementary cementitious materials (SCMs) into concrete mixtures. SCMs are materials that can be added to cement to improve its performance and reduce the amount of portland cement required. Common SCMs include fly ash, blast furnace slag, and silica fume, as well as ground granulated blast furnace slag (GBFS), ground limestone, and gypsum. These materials, known as gcca, not only contribute to reducing carbon emissions but also enhance the durability and strength of concrete. By increasing the use of SCMs in concrete production, the industry can minimize its environmental impact and work towards more sustainable construction practices. Design and Construction Approaches to Minimize Concrete Use In addition to using low-carbon materials and incorporating SCMs, sustainable urban planning and design can play a significant role in reducing concrete carbon emissions. By adopting design approaches that minimize the use of concrete, such as using alternative materials or optimizing structural systems, the amount of concrete needed in construction projects can be reduced. Additionally, material efficiency strategies, such as maximizing the lifespan of buildings and infrastructure, can further minimize concrete usage. Structural engineers
Concrete vs Asphalt | 2024 Ultimate Guide
Key Highlights Asphalt is more affordable and easier to install, but requires more maintenance, while concrete has more design options and better durability, but is more expensive. Concrete driveways can last up to 50 years, while asphalt driveways have a lifespan of up to 30 years. Concrete is more durable than asphalt, but asphalt is more suitable for colder climates and can withstand high traffic volumes. Asphalt driveways require more maintenance, including regular sealcoating, while concrete driveways need relatively little maintenance. Asphalt driveways are more cost-effective upfront, but concrete driveways have lower long-term maintenance costs. Concrete driveways offer more customization options, including stamped designs and color options. Introduction Are you considering installing a new driveway? If so, you’re likely faced with the choice between concrete and asphalt. Both materials have their own advantages and disadvantages, and it’s important to understand the key differences before making a decision. In this ultimate guide, we will compare concrete and asphalt driveways in terms of durability, maintenance, cost, appearance, and more. By the end of this guide, you will have a clear understanding of which option is right for your home. A driveway is a significant investment, and it’s important to choose a material that not only suits your budget but also meets your aesthetic preferences and long-term needs. So, let’s dive in and explore the differences between concrete and asphalt driveways. Understanding the Basics of Concrete x Asphalt Before we delve into the details, let’s start with a basic understanding of concrete and asphalt driveways. A concrete driveway is made of a mixture of aggregates, cement, and water, which is poured into forms and finished with tints, stains, or engravings. Asphalt, on the other hand, is a black, sticky paving material made from aggregates and a petroleum-based binder. It is heated to make it pliable and easy to roll out, and hardens as it cools. Both concrete and asphalt driveways have their own unique characteristics and properties, which we will explore in more detail. Composition and Material Differences The composition of concrete and asphalt driveways differs significantly. Concrete driveways are made of a mixture of aggregates, cement, and water. Aggregates can include crushed stone, gravel, or sand, while cement acts as a binding agent. The combination of these materials creates a solid and durable surface. On the other hand, asphalt driveways are made from aggregates and a petroleum-based binder. The aggregates used in asphalt driveways are typically crushed stone or sand, while the binder is a byproduct of the petroleum refining process. This binder, known as bitumen, gives asphalt its black color and sticky consistency. The difference in composition directly affects the properties of the two materials. Concrete driveways are known for their strength and durability, while asphalt driveways offer greater flexibility and are less prone to cracking. Initial Installation Process Overview The process of installing a driveway varies depending on the material chosen. For concrete driveways, the installation process typically involves excavating the area, creating a solid foundation, and pouring the concrete mixture into forms. Once the concrete has cured, it is finished with tints, stains, or engravings to achieve the desired aesthetic. In contrast, the installation process for asphalt driveways is relatively simpler. It involves preparing the site, laying a gravel base, and then pouring the hot asphalt mixture onto the prepared surface. The asphalt is then compacted, leveled, and left to cool and harden. Both installation processes require professional expertise and equipment. Hiring a professional contractor is recommended to ensure proper installation and a long-lasting driveway. Durability and Longevity Comparison When it comes to durability and longevity, concrete driveways have the edge over asphalt driveways. Concrete driveways can last up to 50 years with proper maintenance, while asphalt driveways have a lifespan of around 30 years. Concrete is known for its strength and ability to withstand heavy loads. It has a higher compressive strength compared to asphalt, with the ability to withstand up to 6,000 pounds per square inch (PSI) of pressure. However, it is important to note that freezing temperatures and high traffic rates can diminish the strength of concrete driveways. On the other hand, asphalt driveways are more flexible and can better withstand temperature fluctuations. They are more suitable for colder climates, as they are less prone to cracking in freezing temperatures. However, they are sensitive to UV exposure and can soften and deform in hot weather. How Weather Affects Each Material Weather conditions can have a significant impact on the performance of concrete and asphalt driveways. Concrete driveways are more susceptible to weathering in extreme temperature conditions. In colder climates, the expansion and contraction of moisture within the concrete can cause cracking and heaving. Additives, proper drainage, and insulation can help minimize these issues, but they do not eliminate the risk entirely. Asphalt driveways, on the other hand, are more resilient to temperature fluctuations. They can withstand freezing temperatures without significant damage, making them a better option for colder climates. However, they are sensitive to UV exposure and high temperatures. In hot weather, the asphalt can soften and deform, leading to bumps and ruts in the surface. Proper maintenance and regular inspections are essential to ensure the longevity and performance of both concrete and asphalt driveways in different weather conditions. Lifespan and Sustainability Factors When considering the lifespan and sustainability factors of concrete and asphalt driveways, several factors come into play. Concrete driveways have a longer lifespan compared to asphalt driveways, with a potential lifespan of up to 50 years. This is due to their greater durability and ability to withstand heavy loads. In contrast, asphalt driveways have a lifespan of around 30 years. While they may not last as long as concrete driveways, they are still a durable option for most homeowners. Regular maintenance, such as sealcoating, can help extend the lifespan of both concrete and asphalt driveways. In terms of sustainability, both concrete and asphalt driveways have their own environmental impacts. The production of asphalt involves petroleum products, which are non-renewable resources. Concrete, on