Key Highlights
- Concrete pathways are a durable and versatile option for your outdoor space
- You can choose from various pathway designs such as plain concrete, coloured concrete, stamped concrete, and more
- Planning and preparation are key when it comes to DIY concrete pathways
- Essential tools and materials for your concrete pathway include leveling tools, concrete mix, and more
- Designing your pathway with patterns, textures, and colors can add a unique touch to your outdoor space
- Proper maintenance is important to ensure the longevity of your concrete pathway

Introduction
Concrete pathways are a popular choice for homeowners looking to enhance the functionality and aesthetic appeal of their outdoor space. Whether you want to create a walkway from your front yard to your backyard or add a path around your garden, concrete provides a durable and versatile solution.
Concrete pathways come in various designs and styles, allowing you to customize them to suit your personal preferences and the overall design of your outdoor space. From plain concrete to colored concrete and stamped concrete, there are endless possibilities when it comes to creating a unique and beautiful pathway.
In this blog, we will guide you through the process of planning, designing, and creating your own DIY concrete pathway. We will discuss the essential tools and materials you will need, as well as provide step-by-step instructions on how to mix and pour concrete. Additionally, we will explore different design options for your pathway, including incorporating patterns, textures, and colors to ensure both durability and mobility for all users.
By the end of this blog, you will have all the information you need to create a stunning concrete pathway that adds both functionality and visual appeal to your outdoor space.
Planning Your DIY Concrete Pathway
Before diving into the actual construction of your DIY concrete pathway, it is important to spend some time planning and preparing. This will ensure that you have a clear vision of what you want to achieve and that you have all the necessary tools and materials on hand.
When planning your pathway, consider the overall layout of your outdoor space and how the pathway will fit into it. Think about the purpose of the pathway and how it will enhance the accessibility and flow of your outdoor area. Additionally, consider factors such as the size and shape of the pathway, as well as any landscaping features or obstacles you may need to work around.
Assessing Your Outdoor Space
Before you start creating your DIY concrete pathway, it is important to assess your outdoor space and determine the best location for the pathway. Consider the layout of your front garden or backyard and identify areas where a pathway would be most beneficial in terms of accessibility and functionality.
Think about how the pathway will connect different areas of your outdoor space, such as your patio, garden, or driveway. Take into account any existing landscaping features, such as trees or flower beds, and plan the pathway around them to create a cohesive and visually appealing design.
Accessibility is also a crucial factor to consider when assessing your outdoor space. Ensure that the pathway is wide enough for easy passage and that it is free from any obstacles or hazards. This will not only make the pathway safer to walk on but also enhance the overall usability of your outdoor space.
Choosing the Right Pathway Design
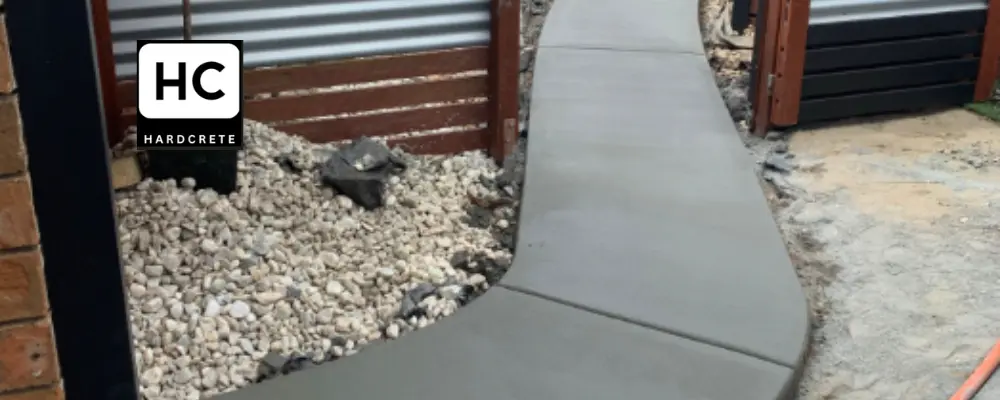
When it comes to choosing the design for your DIY concrete pathway, you have several options to consider. Plain concrete is a versatile choice that can easily blend into any outdoor space. It provides a clean and modern look that is timeless and durable.
Colored concrete, on the other hand, allows you to add a splash of color to your pathway. You can choose from a wide range of hues to complement your home design, landscaping, or other hardscaping features in your front garden.
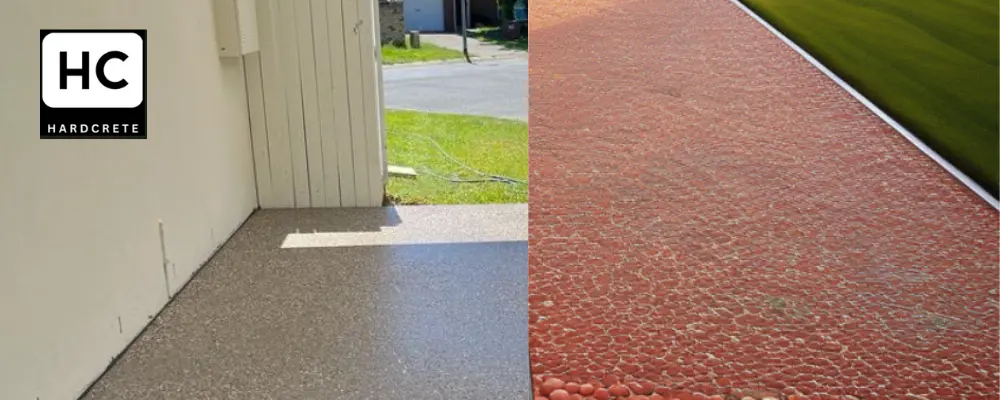
Another popular option is stamped concrete, which allows you to create patterns and textures that mimic the look of stone or brick. This is a cost-effective alternative to using actual stone or brick, and it offers a more modern appeal.
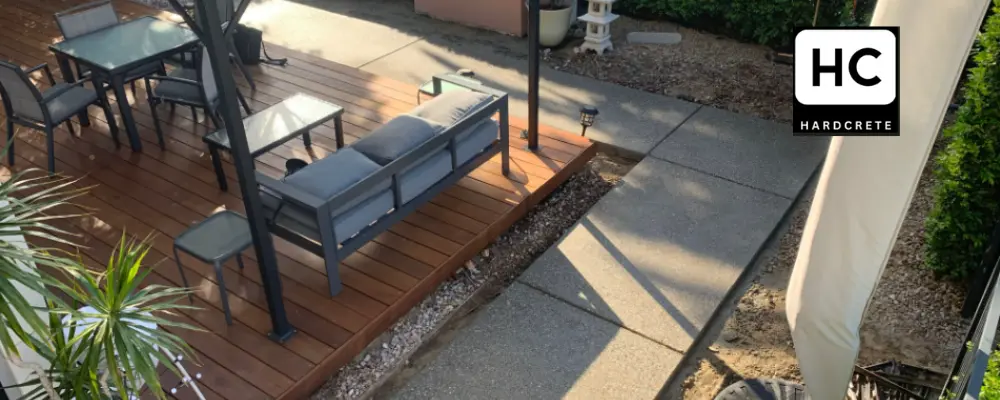
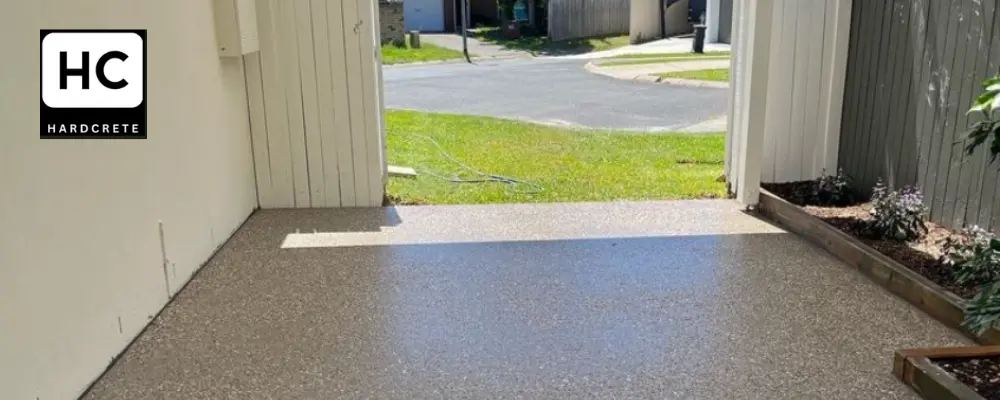
Consider the design versatility of each option and choose the one that best suits your personal style and the overall aesthetic of your outdoor space. Keep in mind that the design of your pathway, including options such as exposed aggregate pathways, can greatly impact the overall look and feel of your outdoor area, so take the time to choose a design that you will love for years to come.
Essential Tools and Materials for Your Concrete Pathway
Before you start creating your DIY concrete pathway, it is important to gather all the essential tools and materials. Having everything on hand will make the construction process smoother and more efficient.
Some of the essential tools you will need include a shovel, wheelbarrow, trowel, levels, and a concrete mixer. These tools will help you with tasks such as digging, leveling, and mixing the concrete.
In terms of materials, you will need concrete mix, water, and any additional materials depending on the design of your pathway. This may include coloring agents for colored concrete or stamping mats for stamped concrete.
By having all the necessary tools and materials, you will be well-prepared to tackle your DIY concrete pathway project.
List of Tools Needed
To create your DIY concrete pathway, you will need the following tools:
- Shovel: For digging and preparing the ground for the pathway
- Wheelbarrow: For mixing the concrete and transporting materials
- Trowel: For spreading and smoothing the concrete
- Levels: For ensuring an even and level surface
- Concrete mixer: For mixing the concrete mixture efficiently
These tools are essential for the various stages of creating your concrete pathway. Make sure to have them on hand before you begin your project to ensure a smooth construction process.
Selecting Quality Concrete Mix
The quality of the concrete mix you use is crucial for the longevity and durability of your DIY concrete pathway. It is important to choose a high-quality concrete mix that is specifically designed for outdoor use.
When selecting a concrete mix, consider factors such as the strength and durability of the mixture. Look for a mix that is suitable for driveways and pathways, as these areas require a more robust and durable concrete.
Additionally, consider the cost of the concrete mix. While it is important to choose a quality product, it is also important to consider your budget. Compare prices and read reviews to ensure that you are getting the best value for your money.
By selecting a high-quality concrete mix, you can ensure that your DIY concrete pathway will withstand the test of time and provide a durable and functional addition to your outdoor space.
Preparing the Ground for Your Pathway
Proper ground preparation is essential for creating a sturdy and long-lasting DIY concrete pathway. This involves marking the pathway area, leveling the ground, and ensuring proper compaction to prevent uneven settling and cracks in the concrete.
Marking the Pathway Area
Before you start preparing the ground for your DIY concrete pathway, it is important to mark the pathway area. This will help you visualize the final dimensions and shape of the pathway.
Start by using stakes and string to outline the desired pathway. This will serve as a guide as you dig and level the ground. Make sure to measure and mark the pathway width to ensure that it is wide enough for easy passage.
Consider the layout of your outdoor space and any existing landscaping features when marking the pathway area. This will help you create a pathway that seamlessly integrates with the overall design of your outdoor area.
Ground Levelling and Compaction
Once you have marked the pathway area, it is time to level the ground and ensure proper compaction. This will create a stable base for the concrete and prevent uneven settling and cracks.
Start by removing any vegetation, rocks, or debris from the pathway area. Use a shovel or a rake to level the ground, ensuring that it is smooth and even. Pay special attention to areas with slopes or uneven terrain, as these may require additional leveling.
After leveling the ground, use a compactor or a tamper to compact the soil. This will help ensure that the ground is firm and stable, providing a solid foundation for the concrete. Compact the soil in layers, working from one end of the pathway to the other.
By properly leveling and compacting the ground, you will create a solid base for your DIY concrete pathway, ensuring its stability and longevity.
Mixing and Pouring Concrete
Once the ground is prepared, it is time to mix and pour the concrete for your DIY pathway. This involves following a step-by-step guide to ensure that the concrete mixture is properly mixed and poured for a professional finish.
Step-by-Step Guide to Mixing Concrete
Mixing concrete correctly is crucial for achieving a strong and durable pathway. Follow these steps to ensure that your concrete mixture is properly mixed:
- Start by adding the desired amount of water to your concrete mixer.
- Gradually add the concrete mix while the mixer is running.
- Continue mixing until the concrete has a smooth and uniform consistency, with no lumps or dry spots.
- Use a trowel or a shovel to transfer the mixed concrete to the pathway area.
- Spread the concrete evenly using a trowel, ensuring that it fills the entire pathway area.
- Use a screed board or a long straightedge to level the concrete, removing any excess material.
- Smooth the surface of the concrete using a trowel or a float.
- Allow the concrete to cure and set according to the manufacturer’s instructions.
Following these steps will ensure that your concrete mixture is properly mixed and poured, resulting in a professional finish for your DIY pathway.
Techniques for Pouring and Spreading Concrete
When pouring and spreading the concrete for your DIY pathway, it is important to use the right techniques to achieve a smooth and even finish. Follow these techniques to ensure a professional result:
- Pour the mixed concrete into the pathway area in a continuous motion.
- Use a shovel or a rake to evenly spread the concrete, ensuring that it fills the entire pathway area.
- Use a screed board or a long straightedge to level the concrete, removing any excess material.
- Smooth the surface of the concrete using a trowel or a float, moving in a back and forth motion.
- Pay special attention to the edges of the pathway, ensuring that they are smooth and straight.
- Allow the concrete to cure and set according to the manufacturer’s instructions, ensuring that it is protected from foot traffic and extreme weather conditions.
By following these techniques, you can achieve a professional finish for your DIY concrete pathway, enhancing the overall look and functionality of your outdoor space.
Designing Your Pathway
Designing your DIY concrete pathway allows you to add a unique touch to your outdoor space. From incorporating patterns and textures to adding color, there are various design elements to consider.
Incorporating Patterns and Textures
One way to enhance the design of your DIY concrete pathway is by incorporating patterns and textures. Stamped concrete is a popular option that allows you to create patterns that mimic the look of stone or brick. From geometric designs to natural textures, there are endless possibilities to choose from.
Another option is to use concrete pavers or stepping stones to create a unique pattern. These can be laid in various arrangements to create a visually appealing design that adds interest to your pathway.
Consider the overall aesthetic of your outdoor space and choose patterns and textures that complement the existing design elements. This will create a cohesive and visually pleasing look for your DIY concrete pathway.
Adding Color to Your Concrete Pathway
Adding color to your DIY concrete pathway can transform it into a standout feature in your outdoor space. Colored concrete allows you to choose from a wide range of hues that can complement or contrast your home design, landscaping, or other hardscaping features.
When selecting a color for your concrete pathway, consider the overall color scheme of your outdoor space. Choose a color that complements the existing elements and enhances the overall aesthetic.
Colored concrete can be achieved by adding a coloring agent to the concrete mix before pouring it. This ensures that the color is evenly distributed throughout the pathway, creating a seamless and vibrant finish.
By adding color to your concrete pathway, you can create a unique and visually appealing design that adds personality and charm to your outdoor space.
Finishing Touches for a Professional Look
To achieve a professional look for your DIY concrete pathway, it is important to pay attention to the finishing touches. Smoothing and sealing the surface and properly curing the concrete are crucial steps in ensuring the longevity and durability of your pathway.
Smoothing and Sealing the Surface
After the concrete has been poured and leveled, it is important to smooth the surface to create a clean and even finish. Use a trowel or a float to remove any imperfections and create a smooth surface.
Once the concrete has cured, it is recommended to seal the surface to enhance its durability and protect it from stains and damage. Choose a quality concrete sealer that is suitable for outdoor use and apply it according to the manufacturer’s instructions.
Smoothing and sealing the surface of your DIY concrete pathway will give it a professional look and help ensure its longevity and durability in the outdoor environment.
Curing the Concrete Properly
Properly curing the concrete is essential for its long-term durability. Curing involves allowing the concrete to dry and harden slowly, which helps prevent cracks and increases its strength.
To cure the concrete properly, cover it with a plastic sheet or use a curing compound to retain moisture and prevent rapid drying. This will ensure that the concrete cures evenly and achieves its maximum strength.
Additionally, it is important to protect the concrete from foot traffic and extreme weather conditions during the curing process. This will prevent any damage or premature wear and tear.
By following the proper curing techniques, you can ensure that your DIY concrete pathway will withstand the test of time and continue to look beautiful for years to come.
Maintenance Tips for Your Concrete Pathway
Proper maintenance is important to keep your DIY concrete pathway in good condition and extend its lifespan. Regular cleaning and prompt repairs are key to ensuring that your pathway remains safe and attractive.
Regular Cleaning and Sealing
Regular cleaning is essential to keep your DIY concrete pathway looking its best. Sweep away any debris, leaves, or dirt on a regular basis to prevent stains and discoloration.
Occasionally, you may need to give your pathway a more thorough clean. Use a mild detergent or concrete cleaner and a stiff brush to remove any stubborn stains or dirt. Rinse the pathway thoroughly with water to ensure that all cleaning residue is removed.
Additionally, consider sealing the concrete on a regular basis to protect it from moisture, stains, and damage. Choose a quality concrete sealer and apply it according to the manufacturer’s instructions.
By regularly cleaning and sealing your concrete pathway, you can keep it looking fresh and new for years to come.
Repairing Cracks and Damage
Over time, your DIY concrete pathway may develop cracks or other signs of damage. Promptly addressing these issues will help prevent further deterioration and ensure the longevity of your pathway.
For small cracks, use a concrete crack filler or a patching compound to repair the damage. Follow the manufacturer’s instructions for the specific product you are using, and make sure to clean and prepare the area before applying the filler or compound.
For larger cracks or more extensive damage, it may be necessary to consult a professional for repairs. They will be able to assess the extent of the damage and recommend the appropriate repair methods.
By regularly inspecting and repairing any cracks or damage, you can maintain the safety and attractiveness of your DIY concrete pathway.
Conclusion
Transform your outdoor space with these easy DIY concrete pathway ideas. From planning and preparation to mixing concrete and adding creative designs, this guide has got you covered. With the right tools and quality materials, you can create a professional-looking pathway that enhances your home’s curb appeal. Regular maintenance, such as cleaning, sealing, and repairing any damage, will keep your pathway looking pristine for years to come. Have fun incorporating patterns, textures, and colors to make your pathway uniquely yours. Get ready to impress your guests with a beautifully crafted concrete pathway that adds both functionality and style to your outdoor area in 2024!
Frequently Asked Questions
Can I add decorative stones to my concrete pathway?
Yes, you can add decorative stones to your concrete pathway to create a unique and visually appealing design. This can be done by embedding the stones into the wet concrete or by placing them on top of the cured concrete.
How long does it take for a concrete pathway to dry?
The drying time for a concrete pathway can vary depending on various factors such as weather conditions and the specific concrete mix used. However, in general, it takes about 24 to 48 hours for the concrete to dry enough for light foot traffic and about 7 to 14 days to fully cure.


