Key Highlights
Concrete pathways offer a-friendly option for enhancing the aesthetic appeal and functionality of your outdoor space.
- With their durability and low maintenance requirements, concrete are a practical choice homeowners.
- You choose between straight and curved to suit your landscape and design preferences.
- DIY installation of a concrete pathway is possible with the right tools and materials.
- cleaning, sealing, and timely repair can help maintain the longevity of your concrete pathway.
- Adding decorative borders and incorporating exposed aggregate finishes can further enhance the appeal of your concrete pathway.

Introduction
Concrete pathways have become increasingly popular among homeowners who are looking for a budget-friendly way to enhance the aesthetic appeal and functionality of their outdoor spaces. Concrete is a versatile material that offers a wide range of design options and benefits, such as durability, low maintenance, and practicality.
Whether you want to create a pathway from the side of your house to your garden or construct a walkway to your front door, concrete is an excellent choice. It can be customized to match the style and color scheme of your home, giving it a cohesive and visually appealing look. Additionally, concrete pathways are known for their long lifespan, making them a wise investment for any homeowner.
In this guide, we will walk you through the process of planning, installing, and maintaining a budget-friendly concrete pathway. We will explore different design options, including straight and curved pathways, as well as decorative borders and exposed aggregate finishes. By the end of this guide, you will have all the information you need to create a beautiful and durable concrete pathway that will enhance the overall look of your outdoor space.
Planning Your Concrete Pathway
Before you start the installation process, it is important to plan your concrete pathway carefully. Consider the landscape of your outdoor area and how the pathway will fit into the overall design. Think about where you want the pathway to start and end, and how it will connect different areas of your outdoor space.
Take into account any obstacles or features in your landscape, such as trees or flower beds, that may need to be worked around. Measure the area where the pathway will be installed to determine the amount of concrete and other materials you will need.
Keep in mind the purpose of the pathway. If you are creating a pathway from the side of your house to the backyard, consider the width and length of the pathway to ensure it is practical for daily use. If you are creating a pathway to the front door, think about the aesthetic appeal and how it will complement the overall design of your home.
Assessing Your Landscape and Pathway Needs
When assessing your landscape and pathway needs, consider the practicality of the pathway. Will it be used for walking or for other purposes, such as pushing a wheelbarrow or carrying heavy objects? This will determine the width and strength of the pathway.
If you have a sloping landscape, you may need to consider steps or ramps to ensure accessibility. If you have a concrete driveway, you may want to connect the pathway to it seamlessly.
Consider the overall design of your landscape and how the pathway will fit into it. Will it be a focal point or a subtle addition? Take into account any existing features, such as trees or flower beds, and plan the pathway around them.
By assessing your landscape and pathway needs, you can ensure that your concrete pathway is not only visually appealing but also practical and functional for everyday use.
DIY Concrete Pathway Installation Steps
If you enjoy DIY projects, you can save money by installing your own concrete pathway. Here are the basic steps to follow:
- Prepare the ground: Excavate the area where the pathway will be installed and create a firm base. Install formwork to define the shape of the pathway.
- Add gravel: Add a layer of gravel to the excavated area to improve drainage and provide a stable base for the concrete.
- Mix the concrete: Follow the instructions on the cement and concrete mix to create the right consistency for pouring.
- Pour the concrete: Pour the concrete onto the prepared area within the formwork. Use a trowel to spread and level the concrete.
- Finish the surface: Use a float or trowel to smooth the surface of the concrete. Add any decorative finishes or textures at this stage.
- Allow the concrete to cure: Cover the concrete with plastic or damp burlap to prevent it from drying out too quickly. Allow it to cure for at least 7 days before using the pathway.
By following these steps and using the right tools and materials, you can successfully install a DIY concrete pathway that is both functional and aesthetically pleasing.
Preparing the Ground for Your Pathway
Before you start pouring the concrete for your pathway, it is important to properly prepare the ground. This will ensure that the pathway is stable and long-lasting.
The first step is to excavate the area where the pathway will be installed. Dig down to a depth of at least 4 inches to remove any grass, plants, or debris. Use a shovel or a small excavator to make the process easier.
Once the area is excavated, you will need to install formwork to define the shape and dimensions of the pathway. Formwork can be made from wood, plastic, or metal and should be secured firmly in place.
After the formwork is in place, add a layer of gravel to the excavated area. This will provide a stable base for the concrete and help with drainage. Compact the gravel using a hand tamper or a plate compactor to ensure a solid foundation.
By properly preparing the ground, you are setting the stage for a successful concrete pathway installation. Taking the time to excavate, install formwork, and add gravel will result in a pathway that is durable and long-lasting.
Mixing and Pouring the Concrete
Once the ground is prepared, it’s time to mix and pour the concrete for your pathway. Follow these steps for a successful installation:
- Mix the concrete: Follow the instructions on the cement and concrete mix to create the right consistency. Use a mixing container and a drill with a mixing attachment to mix the materials thoroughly.
- Pour the concrete: Start pouring the concrete onto the prepared area within the formwork. Work in small sections at a time to ensure an even pour. Use a trowel or a screed board to spread the concrete and make it level.
- Smooth the surface: Once the concrete is poured, use a float or a trowel to smooth the surface. This will remove any air bubbles and create a finished look. You can also add decorative finishes or textures at this stage.
- Allow the concrete to cure: Cover the concrete with plastic or damp burlap to prevent it from drying out too quickly. Allow it to cure for at least 7 days before using the pathway.
If you are not confident in your ability to mix and pour the concrete yourself, consider hiring professional concreters. They have the expertise and experience to ensure a high-quality and long-lasting concrete pathway.
Finishing Touches for a Professional Look
To achieve a professional look for your concrete pathway, consider adding finishing touches that will enhance its appearance. Here are some options to consider:
- Decorative finishes: You can choose from a variety of decorative finishes, such as stamped patterns, exposed aggregate, or colored concrete. These finishes can add texture, pattern, and color to the surface of the concrete, giving it a more visually appealing look.
- Surface treatments: Applying a sealer to the surface of the concrete can help protect it from stains, moisture, and wear and tear. It can also enhance the color and shine of the concrete, giving it a polished and finished appearance.
- Edging: Adding an edging material, such as bricks or pavers, can create a clean and defined border for your pathway. This can give it a more finished and polished look, as well as provide a visual separation from the surrounding landscape.
By adding these finishing touches, you can transform your concrete pathway into a visually appealing and professional-looking feature of your outdoor space.
Cost-Effective Maintenance and Repair Tips
One of the benefits of a concrete pathway is its low maintenance requirements. However, regular cleaning and occasional repairs are necessary to ensure its longevity and keep it looking its best. Here are some cost-effective maintenance and repair tips for your concrete pathway:
- Regularly sweep or hose down the pathway to remove dirt, leaves, and debris. This will prevent them from staining the surface or causing slip hazards.
- Apply a concrete sealer every few years to protect the surface from stains, moisture, and UV damage. This will also help maintain the color and appearance of the concrete.
- Inspect the pathway for cracks or damage and repair them promptly. Small cracks can be filled with a concrete crack filler, while larger cracks may require professional repair.
By following these maintenance and repair tips, you can keep your concrete pathway in great condition for years to come, reducing the need for costly replacements or extensive repairs.
Fixing Cracks and Damage on a Budget
If you notice cracks or damage on your concrete pathway, it is important to address them promptly to prevent further deterioration. Here are some budget-friendly tips for fixing cracks and damage on your pathway:
- Small cracks can be filled with a concrete crack filler or a mixture of cement and water. Clean the crack thoroughly and apply the filler using a putty knife. Smooth the surface and allow it to dry before using the pathway.
- For larger cracks or areas of damage, you may need to hire a professional concrete repair company. They can assess the extent of the damage and provide the necessary repairs to ensure the longevity of the pathway.
- Regular maintenance, such as sealing the pathway and avoiding heavy loads or impact, can help prevent cracks and damage in the first place.
By taking these budget-friendly measures, you can extend the lifespan of your concrete pathway and avoid costly repairs or replacements.
Enhancing Your Pathway with Decorative Borders
Adding a decorative border to your concrete pathway can elevate its aesthetic appeal and tie it in with the surrounding landscape. Here are some ways to enhance your pathway with decorative borders:
- Use pavers or bricks to create a clean and defined border. These materials come in a wide range of colors and styles, allowing you to customize the look of your pathway.
- Consider using colored concrete for the border to create a cohesive and visually appealing design.
- Experiment with different patterns, textures, and shapes to add interest and uniqueness to your pathway.
By incorporating decorative borders, you can transform your concrete pathway into a standout feature of your outdoor space.
Selecting Materials for Borders
When selecting materials for your pathway borders, you have several options to choose from. Here are some popular choices:
- Pavers: Pavers are a versatile option that comes in various shapes, sizes, and colors. They can be easily installed and provide a clean and defined border for your pathway. Pavers can be made from materials such as concrete, clay, or natural stone, giving you a wide range of design possibilities.
- Colored concrete: Colored concrete borders can be poured in place or precast to create a seamless look. They offer a wide range of colors and can be customized to match the aesthetic of your pathway.
- Decorative gravel or pebbles: Gravel or pebble borders can add texture and interest to your pathway. They can be used alone or in combination with other materials to create a unique and visually appealing border.
Consider your overall design style and the look you want to achieve when selecting materials for your pathway borders. Consult with a professional concreter for guidance and to ensure a high-quality installation.
Installation Techniques for a Seamless Look
To achieve a seamless look for your pathway borders, consider the following installation techniques:
- Use a consistent color palette: Select materials for your borders that complement the color scheme of your pathway. This will create a cohesive and visually pleasing design.
- Create defined edges: Install the borders in a way that creates clean and defined edges. This can be achieved by using formwork or edging tools.
- Pay attention to details: Take the time to carefully align and level the borders. This will ensure a professional and polished finish.
- Add landscaping elements: Incorporate plants, flowers, or other landscaping elements along the borders to soften the look and enhance the overall aesthetic appeal of your pathway.
By using these installation techniques, you can achieve a seamless and visually appealing look for your pathway borders, creating a standout feature in your outdoor space.
The Benefits of Exposed Aggregate Finishes
Exposed aggregate finishes offer a unique and visually appealing option for your concrete pathway. Here are some benefits of choosing exposed aggregate:
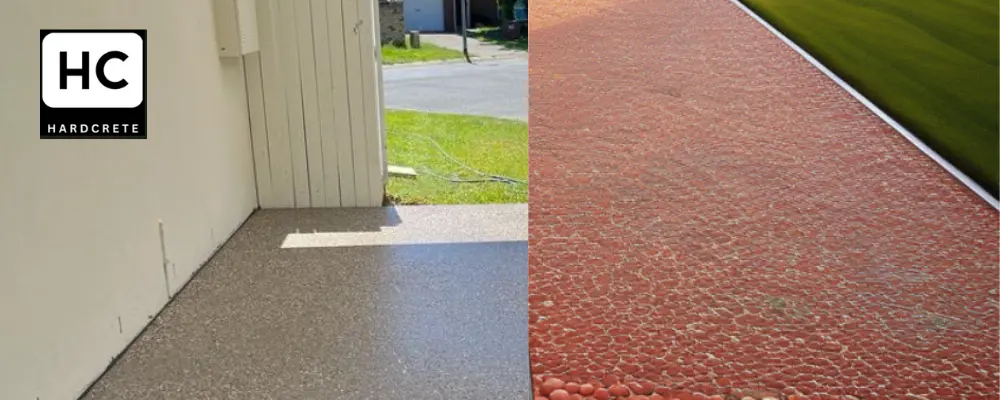
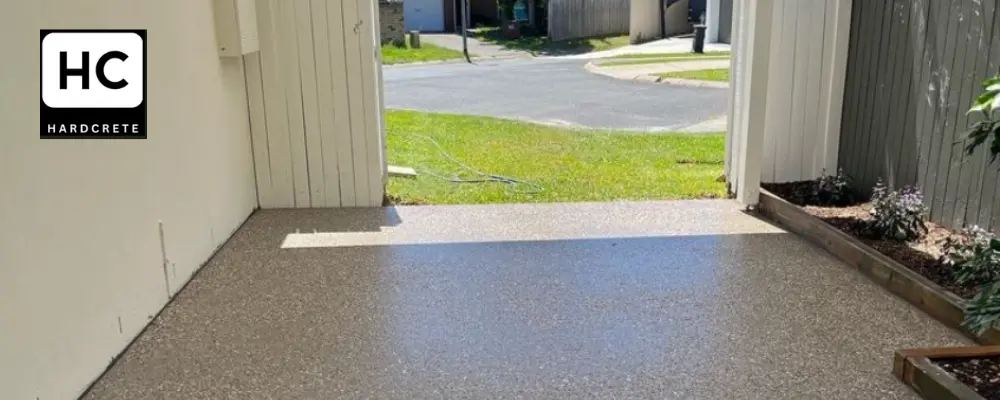
- Aesthetic appeal: Exposed aggregate finishes showcase the natural beauty of stones or pebbles embedded in the concrete. They add texture and visual interest to your pathway.
- Durability: Exposed aggregate finishes are highly durable and can withstand heavy foot traffic, making them a long-lasting option for your pathway.
- Low maintenance: Exposed aggregate finishes require minimal maintenance, making them a convenient choice for busy homeowners.
By opting for an exposed aggregate finish, you can create a pathway that is both visually appealing and durable, adding value to your outdoor space.
Why Choose Exposed Aggregate
Exposed aggregate finishes are a popular choice for concrete pathways due to their unique aesthetic appeal and durability. Here are some reasons to choose exposed aggregate for your pathway:
- Aesthetic appeal: Exposed aggregate finishes create a natural and textured look that adds visual interest to your pathway. The stones or pebbles embedded in the concrete come in a variety of colors, shapes, and sizes, allowing for endless design possibilities.
- Durability: Exposed aggregate finishes are highly durable and can withstand heavy foot traffic and various weather conditions. The stones or pebbles provide an added layer of strength and protection to the concrete, ensuring a long-lasting pathway.
- Low maintenance: Exposed aggregate finishes require minimal maintenance. Regular cleaning and occasional sealing are all that is needed to keep the pathway looking its best.
By choosing exposed aggregate for your pathway, you can create a visually stunning and durable feature that will enhance the overall look of your outdoor space.
How to Achieve the Perfect Exposed Aggregate Finish
Achieving the perfect exposed aggregate finish for your pathway requires careful planning and execution. Here are some steps to follow:
- Select the right aggregate: Choose stones or pebbles that complement the overall design and color scheme of your pathway. Consider the size and shape of the aggregate to achieve the desired texture and visual appeal.
- Mix and pour the concrete: Follow the same steps for mixing and pouring the concrete as mentioned earlier. Make sure to achieve the desired thickness and consistency for the exposed aggregate finish.
- Expose the aggregate: Once the concrete has set but is still workable, use a broom or brush to remove the top layer of cement and expose the aggregate. Apply moderate pressure to achieve the desired depth of exposure.
- Clean and seal the surface: After the concrete has fully cured, clean the surface by removing any loose debris or excess cement. Apply a concrete sealer to protect the exposed aggregate and enhance its color and shine.
By following these steps, you can achieve a perfect exposed aggregate finish for your pathway, creating a visually stunning and durable feature in your outdoor space.
Ultimate concrete pathway ideas
Concrete pathways are versatile and can be customized to suit various design styles and preferences. Here are some ultimate concrete pathway ideas to inspire you:
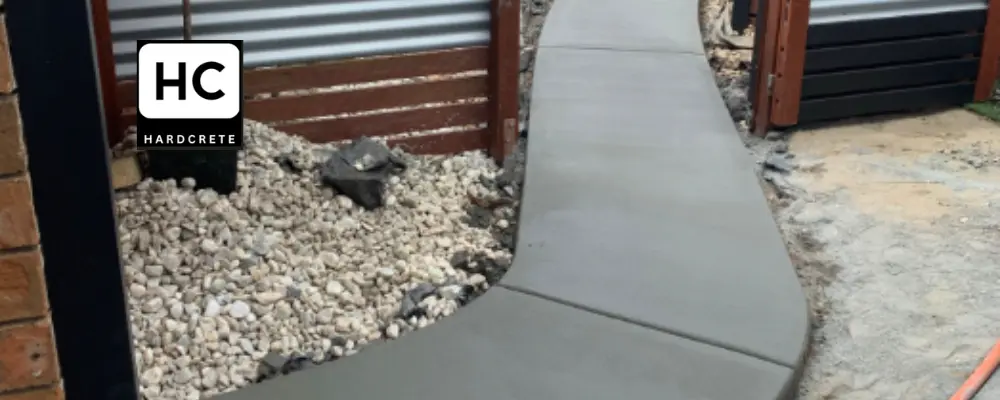
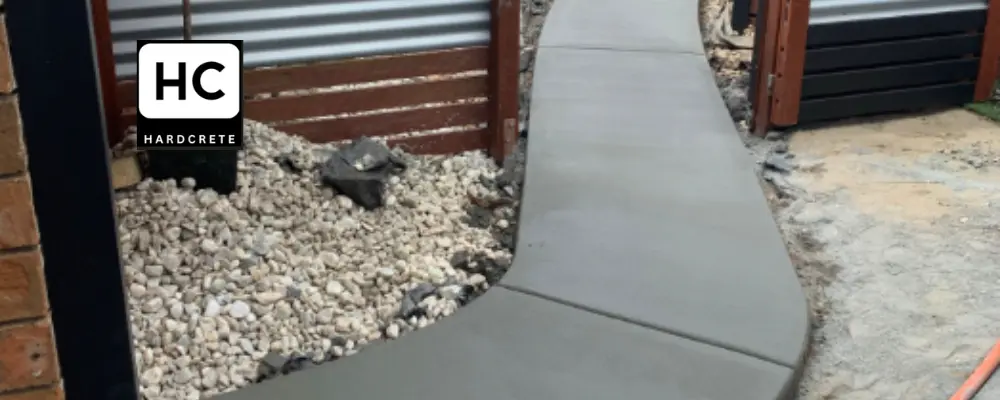
- Modern Concrete Walkway: A sleek and minimalist design that complements modern architectural styles. Use plain concrete or choose a decorative finish to add texture and visual interest.
- Concrete Paver Pathway: Incorporate concrete pavers to create a classic and timeless look. Choose from a variety of shapes, sizes, and colors to match your aesthetic.
- Poured Concrete Pathway: A simple and practical option that offers durability and low maintenance. Customize the shape and design to suit your landscape.
- Stamped Concrete Walkway: Add patterns and textures to your concrete pathway by using stamped concrete. Create the look of stone, brick, or other materials with added durability.
- Crack-free Concrete Pathway: Opt for a crack-free concrete mix to ensure a long-lasting and visually appealing pathway. Choose a decorative finish to enhance the overall look.
By considering these ultimate concrete pathway ideas, you can find inspiration for creating a beautiful and functional pathway that suits your style and needs.
Modern Concrete Walkway
A modern concrete walkway can add a sleek and contemporary touch to your outdoor space. Here are some ideas to create a modern look for your concrete walkway:
- Use plain concrete for a minimalist design that highlights the clean lines and simplicity of modern architecture.
- Consider adding a decorative finish, such as exposed aggregate or stamped patterns, to add texture and visual interest.
- Incorporate lighting along the walkway to create a dramatic and inviting atmosphere.
- Use geometric shapes or patterns to create a unique and eye-catching design.
- Choose a color that complements the overall color scheme of your outdoor space.
A modern concrete walkway is a versatile option that can be customized to suit any style or preference, making it a popular choice among homeowners.
Concrete Paver Pathway
Concrete paver pathways offer a classic and timeless look that can enhance the overall aesthetic appeal of your outdoor space. Here are some ideas for creating a concrete paver pathway:
- Choose from a variety of paver shapes, sizes, and colors to create a unique design.
- Consider using different paver patterns, such as herringbone or basket weave, to add visual interest.
- Create a border using a contrasting paver color or shape to define the pathway.
- Install the pavers in a random pattern for a more natural and organic look.
- Use pavers with a textured surface for enhanced traction and durability.
Concrete paver pathways are practical, durable, and low maintenance, making them a popular choice for homeowners.
Poured Concrete Pathway
A poured concrete pathway is a simple and practical option that offers durability and low maintenance. Here are some ideas for creating a poured concrete pathway:
- Customize the shape and design of the pathway to suit your landscape and preferences.
- Consider adding decorative finishes, such as exposed aggregate or stamped patterns, for added visual interest.
- Use formwork to create clean and defined edges for the pathway.
- Add expansion joints to prevent cracking and ensure the longevity of the pathway.
- Apply a concrete sealer to protect the surface from stains and enhance its durability.
Poured concrete pathways are a cost-effective and versatile option that can be customized to suit any style or design preference.
Crack-free Concrete Pathway
A crack-free concrete pathway offers a visually appealing and durable option for your outdoor space. Here are some ideas for creating a crack-free concrete pathway:
- Choose a concrete mix that is specifically designed to resist cracking.
- Ensure proper installation by following the recommended procedures and using the right tools and techniques.
- Add reinforcement, such as wire mesh or fiber reinforcement, to increase the strength and durability of the pathway.
- Apply a concrete sealer to protect the surface from moisture and weather damage.
- Regularly inspect and maintain the pathway to prevent cracks from developing.
A crack-free concrete pathway is a long-lasting and low-maintenance option that can enhance the overall look of your outdoor space.
Conclusion
In conclusion, creating a budget-friendly concrete pathway doesn’t have to be complicated. By following the right steps and maintenance tips, you can enhance your outdoor space with a durable and visually appealing pathway. Whether you opt for a modern walkway or a stamped design, proper planning and execution can elevate your landscape. Remember to consider the longevity of your pathway and choose materials that suit your needs. With a little effort and creativity, you can transform your outdoor area into a welcoming and functional space for years to come.
Frequently Asked Questions
What Is the Most Cost-Effective Concrete Mix?
The most cost-effective concrete mix depends on your specific project and requirements. However, a concrete mix that includes a higher proportion of aggregate and less cement can be more cost-effective while still providing durability and practicality.
How Long Does a Concrete Pathway Last?
With proper installation and maintenance, a concrete pathway can last for decades. The durability of the pathway depends on factors such as the quality of the concrete, the climate, and the level of maintenance and care it receives.
Can I Install a Concrete Pathway Myself?
Yes, it is possible to install a concrete pathway yourself if you have the necessary tools, materials, and knowledge. However, hiring professional concreters is recommended for larger or more complex projects to ensure a high-quality and long-lasting result.
How to Prevent Cracks in Concrete Pathways?
To prevent cracks in concrete pathways, ensure proper installation, use a high-quality concrete mix, and follow recommended maintenance practices. Regularly inspect the pathway for any signs of damage or wear and address any issues promptly.
Best Season for Concrete Pathway Installation
The best season for concrete pathway installation is during mild weather conditions, typically in spring or fall. Avoid extreme temperatures, as they can affect the curing process and the overall quality of the pathway. Consult with a professional concreter for guidance on the ideal installation season for your specific location.


