Key Highlights
- DIY concrete repair can save you money improve the curb appeal of your home.
- Identifying the need for concrete repair is crucial to prevent further damage to the concrete structure.
- Common signs of concrete damage include cracks, uneven surfaces, and discoloration.
- Knowing when to opt for professional help versus DIY depends on the complexity of the repair and your experience.
- Preparing for concrete repair involves cleaning the area and gathering the necessary tools and materials.
- Different types of concrete cracks require different repair methods.
- Fixing uneven concrete surfaces can be achieved through leveling techniques and addressing sunken or raised sections.
- Repairing concrete driveways and walkways involves patching potholes and surface imperfections or opting for resurfacing or a complete overhaul.
- Enhancing the durability of repaired concrete can be achieved through sealing and waterproofing, as well as implementing preventive measures.
- Adding creative touches to repaired concrete areas can give them a unique look and include options such as adding color or textures and incorporating decorative overlays.
- Safety considerations for DIY concrete work include using personal protective equipment and understanding concrete mixing ratios.
- Frequently asked questions about DIY concrete repair include whether it is possible to repair cracked concrete yourself, how long it takes for concrete repairs to dry, and the best materials for filling concrete cracks.
- Conclusion: DIY residential concrete repair is a cost-effective way to improve the condition and appearance of your concrete surfaces. By following the right techniques and using quality materials, you can successfully tackle concrete cracks, uneven surfaces, and other common issues. However, it’s important to know when to seek professional help and to prioritize safety throughout the process. With the right knowledge and tools, you can achieve durable and visually appealing concrete repairs.
Introduction
Whether it’s a small crack or a sunken section, residential concrete repair is a common need for homeowners. Understanding the signs of concrete damage and knowing when to tackle repairs yourself or seek professional help can make a significant difference. By learning about the various types of concrete cracks and the best techniques for fixing uneven surfaces, you can enhance the durability of your concrete structures and save on repair costs down the line. Let’s dive into the world of DIY concrete repair!
Identifying the Need for Concrete Repair
Concrete repair becomes crucial when surfaces show signs of damage like visible cracks, spalling, or unevenness. These issues not only impact the aesthetics but also compromise the structural integrity of the concrete. Understanding when to engage professional services or embark on DIY solutions depends on the severity of the damage and one’s comfort level with repair work. Identifying these needs promptly can prevent further deterioration and potential safety hazards, ensuring the longevity and safety of your concrete structures.
Common Signs of Concrete Damage
Seeing cracks, spalling, or uneven surfaces are common signs of concrete damage. These issues can indicate underlying problems with the concrete structure. Additionally, discoloration, rust stains, or dampness may point to more severe concerns like concrete cancer or corrosion. Identifying these signs early can prevent further deterioration and costly repairs down the line. Regular inspections and prompt repairs ensure the longevity of your concrete surfaces, preserving both their functionality and aesthetic appeal.
When to Opt for Professional Help vs. DIY
When deciding between professional help and DIY for residential concrete repair, consider the complexity of the damage. For intricate issues like deep cracks or extensive surface unevenness, seeking expert repair services with years of experience is advisable. DIY works well for minor hairline cracks or small surface imperfections. If unsure, it’s wise to consult repair specialists who can provide a free quote and ensure quality workmanship. Balance the scale of the repair project with your comfort level and available resources before making a decision.
Preparing for Concrete Repair
Before diving into residential concrete repair, it’s crucial to prepare adequately for the task ahead. Begin by cleaning the area and clearing any debris to ensure a smooth surface for repair work. Gather essential tools and materials like crack fillers, sealers, and concrete mix. Understanding the types of concrete cracks and their repairs is essential for effective restoration. By investing time in preparation, you set the stage for a successful DIY concrete repair project, saving time and ensuring a durable outcome.
Cleaning the Area and Removing Debris
To ensure a successful residential concrete repair, start by cleaning the area thoroughly and removing any debris. Use a broom, pressure washer, or vacuum to clear the space. Eliminating dirt and debris helps the repair materials adhere better, resulting in a more durable and lasting fix. By creating a clean surface, you’re setting the stage for a successful DIY concrete repair project. Remember, proper preparation is key to achieving professional results.
Tools and Materials Needed for DIY Concrete Repair
For a successful DIY concrete repair project, you’ll need essential tools like a hammer, chisel, wire brush, trowel, gloves, and safety goggles. Materials such as concrete mix, bonding adhesive, sealer, and a bucket for mixing are crucial. Don’t forget a level, measuring tape, and a sponge for a smooth finish. These items will ensure you’re well-equipped to tackle any concrete repair job efficiently and effectively. Remember to work safely and follow instructions carefully to achieve the best results.
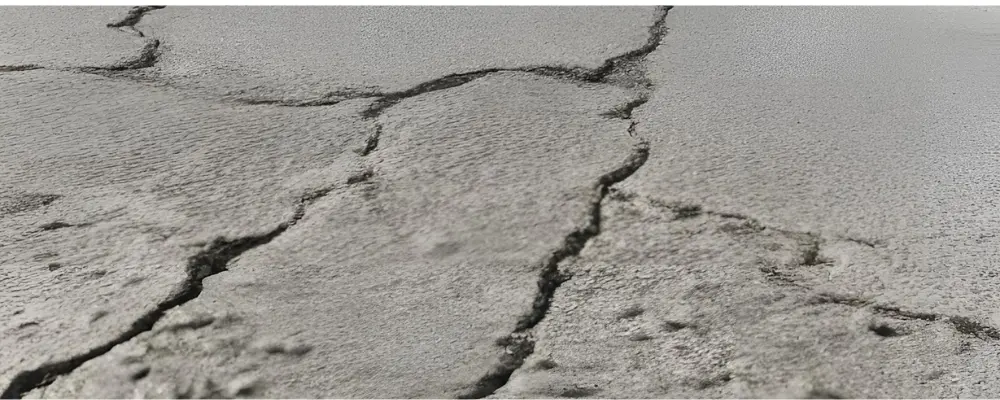
Types of Concrete Cracks and Their Repairs
Hairline cracks in concrete are commonly caused by minor shifts in the ground beneath. To fix them, apply a concrete sealer or epoxy filler that penetrates the crack. Deep cracks, usually a result of more serious structural issues, necessitate professional intervention for precise repair. Epoxy injections or polyurethane foams are typically used to restore the integrity of the concrete. Understand the type of crack present to determine the appropriate repair method, ensuring the longevity of your concrete surface.
Hairline Cracks: Causes and Fixes
Hairline cracks in concrete can be caused by various factors such as temperature fluctuations, shrinkage, or minor structural movements. To fix them, start by cleaning the crack with a wire brush and then fill it with a concrete patching compound. Ensure the area is properly sealed to prevent water infiltration, which can worsen the crack. Consider using epoxy injections for a more robust repair. Remember, addressing hairline cracks promptly can prevent larger issues down the road.
Deep Cracks: Step-by-Step Repair Guide
To effectively repair deep concrete cracks, start by cleaning the area thoroughly and removing any debris. Next, using suitable tools and materials like concrete crack injections, follow the manufacturer’s instructions for a precise application. Fill the crack completely, ensuring no air gaps. Allow ample time for curing as per product guidelines. Finish by sealing the repaired area to prevent future damage. A carefully executed repair job can restore the structural integrity of your concrete surface.
Fixing Uneven Concrete Surfaces
To address uneven concrete surfaces, consider leveling techniques to restore the structural integrity. Sunken or raised sections can be rectified using appropriate methods to ensure a smooth and stable surface. By understanding the underlying causes of the unevenness, you can apply the suitable remedy effectively. Simple steps such as leveling compounds or specialized tools can help in achieving a seamless finish, enhancing both functionality and aesthetics of the repaired area.
Techniques for Leveling Concrete
To ensure a smooth and even surface when repairing concrete, consider using self-leveling concrete. This method is ideal for addressing minor imperfections and creating a flat base for further repairs. Another technique involves using a straight edge or trowel to level the concrete manually. By using these techniques, you can achieve a professional finish without the need for expensive equipment or specialized skills. Implementing proper leveling techniques is crucial for the success of your DIY concrete repair project.
Addressing Sunken or Raised Concrete Sections
If you notice sunken or raised concrete sections, addressing them promptly is crucial. Sunken areas can lead to pooling water and potential tripping hazards, while raised sections may pose a risk of uneven surfaces. Using techniques like mudjacking or slab leveling can help restore the concrete to its original state. Ignoring these issues could result in further damage over time. It’s best to tackle these problems early on to maintain the safety and aesthetics of your property.
Repairing Concrete Driveways and Walkways
Patching up the concrete driveways and walkways is a crucial DIY task for homeowners. From addressing pesky potholes to smoothing out surface imperfections, these repairs enhance the curb appeal of your property. Consider resurfacing for a fresh look or decide whether a complete overhaul is needed. By opting for these repairs, you not only improve the aesthetics but also ensure the durability of your outdoor concrete spaces. Take pride in your home improvement projects with these simple yet effective techniques.
Patching Potholes and Surface Imperfections
To tackle patching potholes and surface imperfections, start by clearing the area of debris and loose material. Next, fill the pothole with a concrete patch mix, ensuring it is level with the surrounding surface. Smooth it out with a trowel for a seamless finish. For surface imperfections, use a concrete resurfacer to cover and repair flaws like cracks or pits. Follow the product instructions carefully for the best results and consider sealing the patched areas for added protection.
Resurfacing vs. Complete Overhaul
When deciding between resurfacing and a complete overhaul for your residential concrete repair, it’s essential to assess the extent of damage and your long-term goals. Resurfacing provides a cost-effective solution that can rejuvenate the existing concrete surface with a fresh look and added durability. On the other hand, a complete overhaul involves replacing the entire concrete structure, which may be necessary for severe damage or if you’re aiming for a significantly different aesthetic. Consider your budget and desired outcome to make the right choice.
Enhancing the Durability of Repaired Concrete
For enhanced durability of repaired concrete, consider sealing and waterproofing to prevent future damage. Applying preventive measures like regular inspections and maintenance can prolong the lifespan of your concrete surfaces. By incorporating quality materials and proper techniques, you can ensure long-lasting results. Sealers help protect against stains, corrosion, and water penetration, providing added strength and longevity to your repairs. Investing in these simple steps can give you peace of mind knowing your concrete will remain resilient for years to come.
Sealing and Waterproofing Tips
To ensure the longevity of your repaired concrete, consider sealing and waterproofing as crucial final steps. Choose a high-quality sealant that suits your specific needs, such as protecting against moisture or UV rays. Prioritize a thorough cleaning and drying of the surface before application to enhance adhesion. For optimal results, follow the manufacturer’s instructions carefully, and apply multiple coats if recommended. Remember, proper sealing not only safeguards your concrete but also adds a polished finish to your DIY repair project.
Preventive Measures to Avoid Future Damages
To ensure the longevity of your residential concrete repair, consider applying preventive measures. Regularly inspect your concrete surfaces for any signs of damage and promptly address them to prevent extensive issues. Applying a quality sealant can protect your concrete from water infiltration and mold growth. Additionally, avoid using harsh chemicals that can deteriorate the concrete. Implementing these preventive measures can help you avoid costly future repairs and maintain the durability of your residential concrete surfaces.
Creative Touches for Repaired Concrete Areas
To elevate your repaired concrete areas, consider adding color or textures for a unique look. Incorporating decorative overlays can enhance the visual appeal and make the surface more aesthetically pleasing. By infusing creativity into your concrete project, you can achieve a personalized touch that stands out. These creative touches not only improve the appearance but also add character to the renovated space, providing a fresh and stylish ambiance to your home.
Adding Color or Textures to Concrete
For an extra touch, consider enhancing your concrete repairs by adding color or textures. Whether it’s a vibrant hue to liven up a dull area or a textured finish for a unique look, there are various options to explore. Stains, aggregates, or decorative overlays can transform your concrete surfaces, elevating their appearance. By incorporating these creative elements, you can enhance the aesthetic appeal of your repaired concrete areas, adding a personalized and stylish flair to your space.
Incorporating Decorative Overlays
When enhancing your repaired concrete areas, consider incorporating decorative overlays to add flair and personality. These overlays offer a creative touch, allowing you to customize the look of your surfaces. By adding color or textures to the concrete, you can achieve a unique and aesthetically pleasing appearance. Decorative overlays provide an opportunity to elevate the overall design of your concrete structures, enhancing the curb appeal of your property. Express your style by exploring different options for decorative overlays.
Safety Considerations for DIY Concrete Work
When engaging in DIY concrete work, safety should be the top priority. Personal Protective Equipment (PPE) like gloves, goggles, and masks are essential. Understanding concrete mixing ratios ensures the mixture’s quality. Following safety protocols, such as proper ventilation when working with chemicals like epoxy, is crucial.
Personal Protective Equipment (PPE) Needed
When engaging in DIY concrete repairs, it’s crucial to prioritize safety. Personal protective equipment (PPE) is a must-have. Ensure you have safety goggles to protect your eyes from debris and gloves to shield your hands from chemicals. Additionally, wearing a mask safeguards your respiratory system from dust and fumes. Don sturdy boots with slip-resistant soles to prevent accidents. By investing in the right PPE, you create a safer environment for yourself while working on your residential concrete repair project.
Understanding Concrete Mixing Ratios
To achieve the right consistency and strength in your DIY concrete repair project, understanding concrete mixing ratios is crucial. Mixing ratios determine the proportions of cement, sand, and aggregate needed for a quality concrete mix. Typically expressed in terms like 1:2:3 or 1:3:5, these ratios ensure the proper balance for durable and long-lasting repairs. By grasping these ratios, you’ll lay a solid foundation for successful concrete work, saving time and money in the process.
Conclusion
Remember, with a little effort and these tips, you can revitalize your residential concrete surfaces easily. From small cracks to uneven surfaces, DIY concrete repair can save you time and money. However, for complex issues like concrete cancer or extensive damage, consider consulting professional repair services. By enhancing the durability of your concrete with sealing and preventive measures, you can ensure the longevity of your repairs. Get creative with decorative overlays to give your concrete a unique and appealing look.
Frequently Asked Questions
Can I repair cracked concrete myself?
Yes, you can repair cracked concrete yourself with the right tools and materials. For hairline cracks, use a concrete patching compound; for deep cracks, follow a step-by-step repair guide. Always wear proper safety gear and ensure the area is clean before starting.
How long does it take for concrete repairs to dry?
Concrete repairs typically take about 24 to 48 hours to dry completely, depending on the type of repair and weather conditions. It’s crucial to allow sufficient time for proper curing before resuming regular use of the repaired area.
What are the best materials for filling concrete cracks?
The best materials for filling concrete cracks include epoxy sealants for hairline cracks and polyurethane caulk for wider cracks. For deep cracks, use concrete patching compound. Always ensure proper surface preparation for effective repair.